How to Download and Install Python
Python is an interpreted, high-level and general-purpose programming language. Python’s design philosophy emphasizes code readability with its notable use of significant whitespace. This article will serve as an informative guide and give you a clear understanding of how to set up a Python environment.
Windows
Download Python Installation Packages
Python for Windows provides various versions of Python installation packages for selection. Of course, considering that the speed of connecting to the Python official website in somewhere may be slow, I recommend using a mirror site to download the Python installation package.
If you know of other mirror sites, please contact me to update them!
install Python
Here are a few common installation methods for Python, you can choose the one that suits you according to your needs.
The Simplest Manual Installation
- Run the installer and select the following two options:
The first option installs Python with administrator privileges.
The second option automatically adds Python to your system environment path (highly recommended).
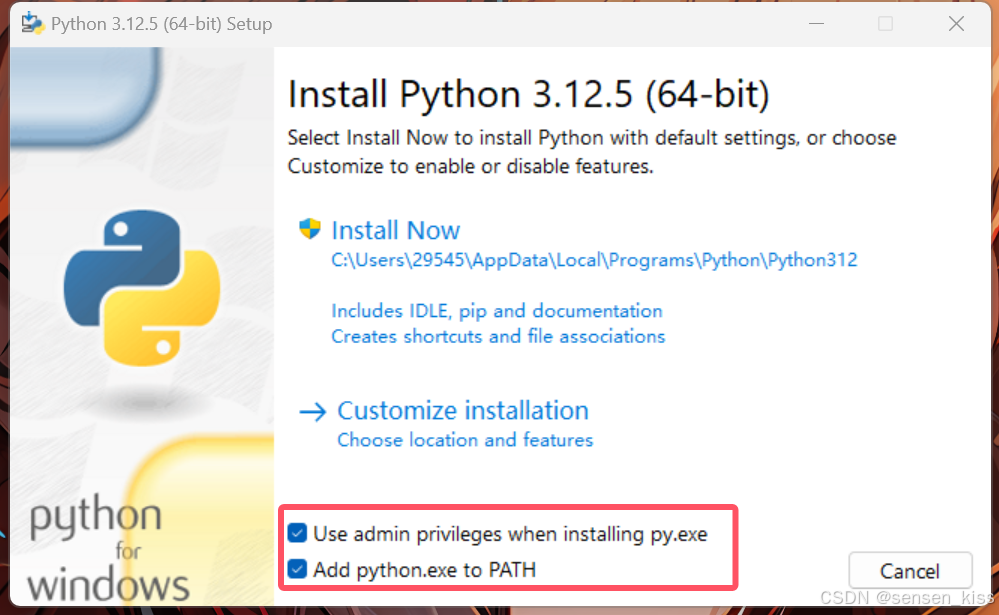
- Click Install Now
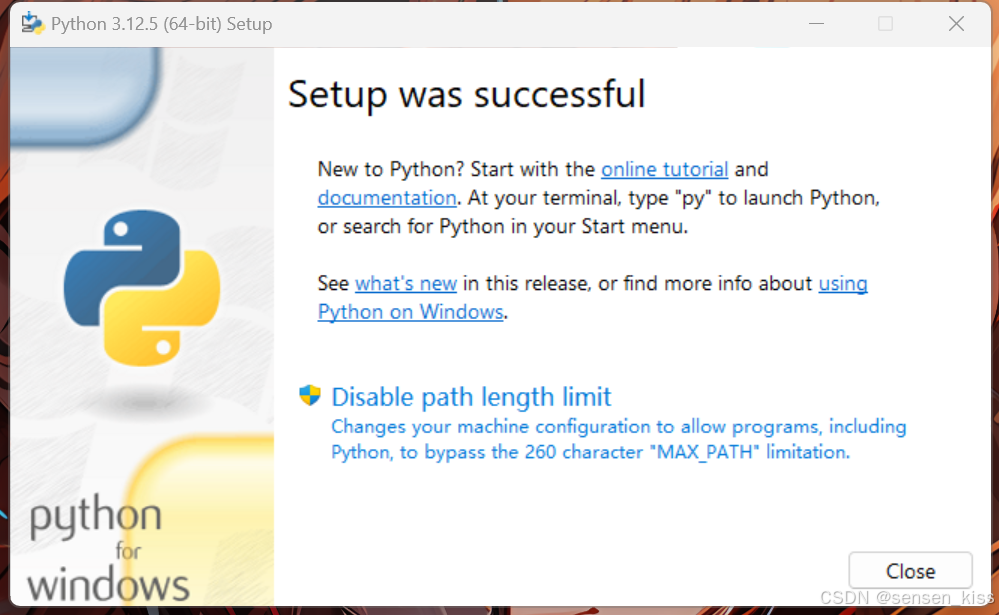
- Click Close , Installation complete!
Customize installation
- Run the installer, still recommended to select the following two options:
- Click Customize installation
- Choose optional features as needed:
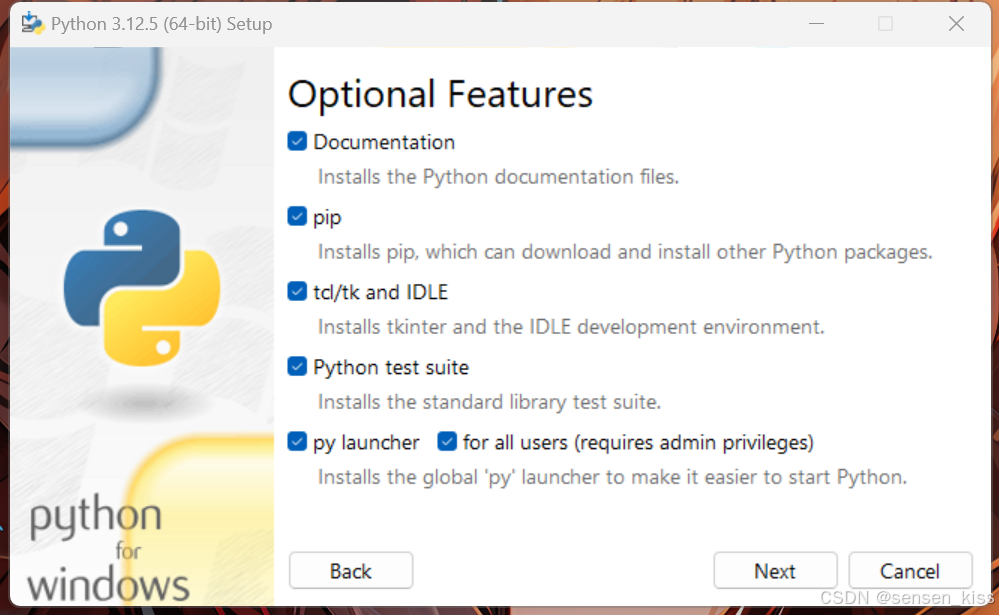
- Documentation: Documentation and help files for installing Python. Select this option only needed
- pip: Python package management tool. Very important, must choose
- tcl/tk and IDLE: tcl/tk and IDLE are two graphical user interfaces, IDLE is Integrated Development Environment and Learning,a python IDE that comes with it. However, we recommend using Pycharm as an IDE for learning.
- Python test suite: Provides a set of test suites for testing Python interpreters and standard libraries. Although beginners generally do not need to use it, this kit is still very useful, it is recommended to choose it.
- py launcher: Ensure user starts python using python commands in the command line
- for all users(requires admin privileges): Ask if choose ‘py launcher’ for all users on the computer. Recommended to choose
- Click Next
- Choose advanced option as needed:
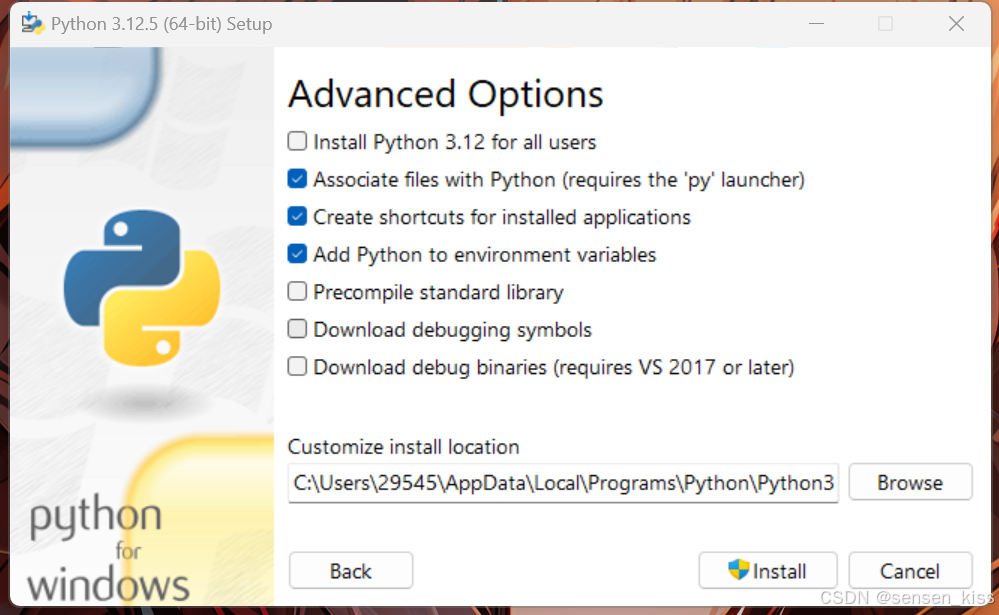
- Install Python 3.12 for all users: Generally has no effect on use, but still recommended to choose it
- Associate files with Python (requires the ‘py’ launcher): Enable the system to automatically associate Python with specific file types. When double click Python script files in File Explorer, the system will automatically use the Python interpreter to run these scripts. This can be chosen as needed, but usually the file will be associated with Pycharm later on
- Create shortcuts for installed applications: Create desktop shortcuts. Generally, there is no need to choose
- Add Python to environment variables: Selecting this option adds the path to the Python interpreter to the system’s environment variables, so that the Python interpreter can be run directly from the command line without having to enter the full path. Recommended to choose
- Precompile standard library: Pre-compiled the Python standard library to improve the import speed of standard library modules. This can be chosen or not
- Download debugging symbols: Debug symbols for developers and debuggers. Choose only need
- Download debug binaries (requires VS 2017 or later): A binary file for debug versions for developers and debuggers. Choose only need
- Select the directory for installation
- Click Install
- Click Close , Complete the installation
The Simplest silent installation/automatic installation
Find the installation package, right-click Properties
Record the File Name and the installation package path in the Location.

Type
cmdin the bottom-left corner of the desktop to open the command prompt as an administrator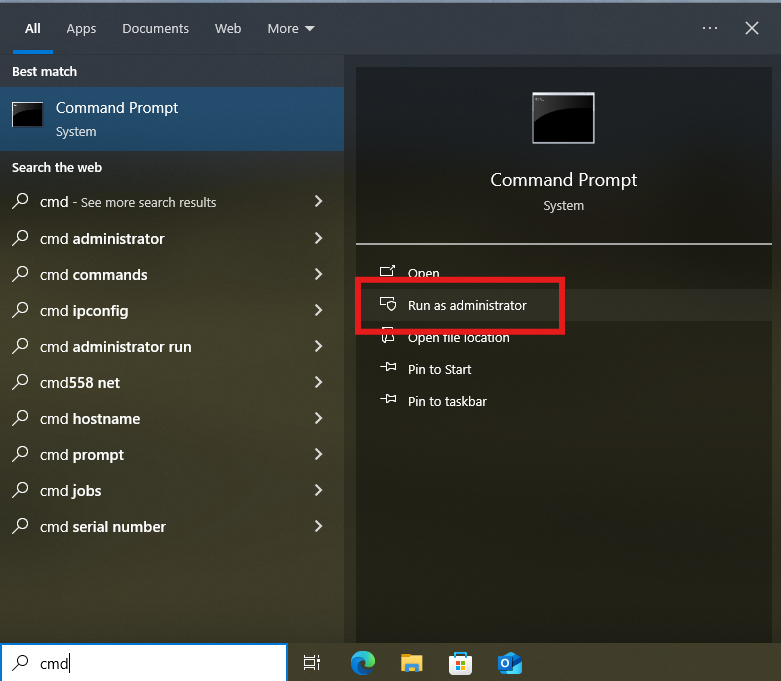
Enter the following commands in sequence:
1
2
cd C:\Users\user\Desktop python-3.13.7-amd64.exe /quiet InstallAllUsers=1 PrependPath=1Attention:
Replace C:\Users\user\Desktop with the installation package path from Step 2.
Replace python-3.13.7-amd64.exe with the filename from Step 2. (don’t forget the .exe)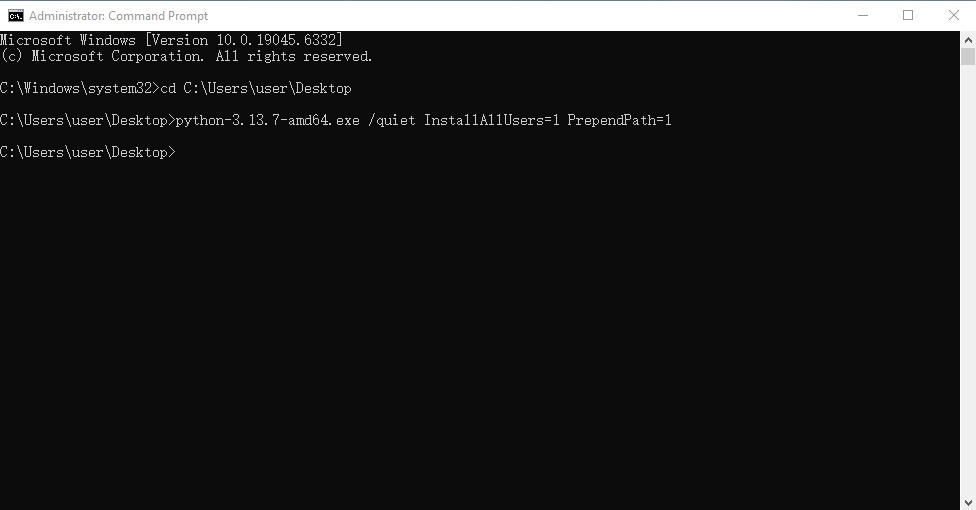
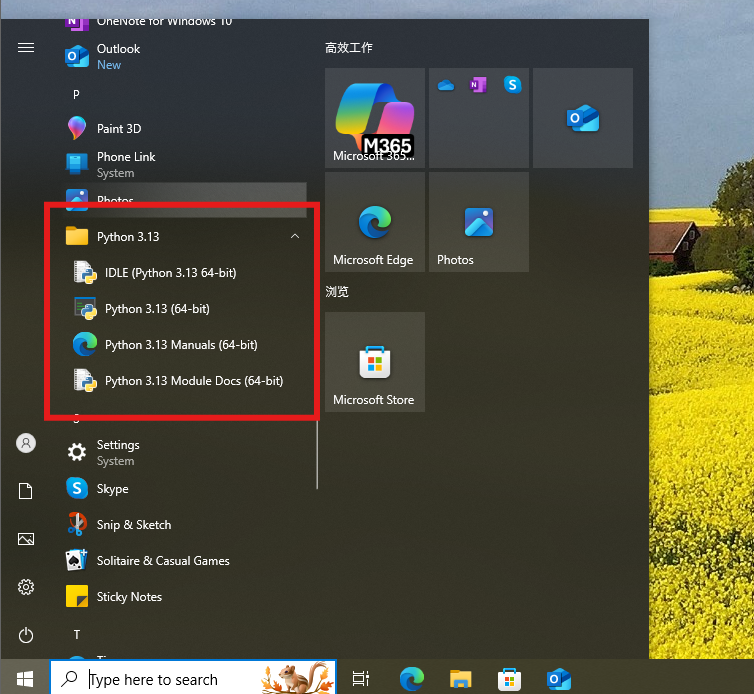
After waiting a few minutes, check in the Start menu to see if the installation is complete.
Custom Script Installation
Create a new text file and name it as
unattend.xmlFill in the content:
 1
 2
 3
 4
 5
 6
 7
 8
 9
10
11
12
13
14
15
16
17
18
19
20
21
22
23
24
25
26
27
<Options> <Option Name="InstallAllUsers" Value="1" /> <Option Name="TargetDir" Value="C:\Python313" /> <Option Name="DefaultAllUsersTargetDir" Value="C:\Python313" /> <Option Name="DefaultJustForMeTargetDir" Value="C:\Python313" /> <Option Name="DefaultCustomTargetDir" Value="C:\Python313" /> <Option Name="AssociateFiles" Value="1" /> <Option Name="CompileAll" Value="1" /> <Option Name="PrependPath" Value="1" /> <Option Name="AppendPath" Value="0" /> <Option Name="Shortcuts" Value="1" /> <Option Name="Include_doc" Value="1" /> <Option Name="Include_debug" Value="1" /> <Option Name="Include_dev" Value="1" /> <Option Name="Include_exe" Value="1" /> <Option Name="Include_launcher" Value="1" /> <Option Name="InstallLauncherAllUsers" Value="1" /> <Option Name="Include_lib" Value="1" /> <Option Name="Include_pip" Value="1" /> <Option Name="Include_symbols" Value="1" /> <Option Name="Include_tcltk" Value="1" /> <Option Name="Include_test" Value="1" /> <Option Name="Include_tools" Value="1" /> <Option Name="LauncherOnly" Value="0" /> <Option Name="SimpleInstall" Value="0" /> <Option Name="SimpleInstallDescription"></Option> </Options>Name Description Default InstallAllUsers Perform a system-wide installation. 0 TargetDir The installation directory Selected based on InstallAllUsers DefaultAllUsersTargetDir The default installation directory for all-user installs %ProgramFiles%\Python X.Y or %ProgramFiles(x86)%\Python X.Y DefaultJustForMeTargetDir The default install directory for just-for-me installs %LocalAppData%\Programs\Python\PythonXY or %LocalAppData%\Programs\PythonXY-32 or %LocalAppData%\Programs\PythonXY-64 DefaultCustomTargetDir The default custom install directory displayed in the UI (empty) AssociateFiles Create file associations if the launcher is also installed 1 CompileAll Compile all .py files to .pyc 0 PrependPath Prepend install and Scripts directories to PATH and add .PY to PATHEXT 0 AppendPath Append install and Scripts directories to PATH and add .PY to PATHEXT 0 Shortcuts Create shortcuts for the interpreter, documentation and IDLE if installed 1 Include_doc Install Python manual 1 Include_debug Install debug binaries 0 Include_dev Install developer headers and libraries. Omitting this may lead to an unusable installation. 1 Include_exe Install python.exe and related files. Omitting this may lead to an unusable installation. 1 Include_launcher Install Python Launcher for Windows 1 InstallLauncherAllUsers Installs the launcher for all users. Also requires Include_launcher to be set to 1 1 Include_lib Install standard library and extension modules. Omitting this may lead to an unusable installation. 1 Include_pip Install bundled pip and setuptools 1 Include_symbols Install debugging symbols (*.pdb) 0 Include_tcltk Install Tcl/Tk support and IDLE 1 Include_test Install standard library test suite 1 Include_tools Install utility scripts 1 LauncherOnly Only installs the launcher. This will override most other options. 0 SimpleInstall Disable most install UI 0 SimpleInstallDescription A custom message to display when the simplified install UI is used (empty) Usually, the value is typically 0 to disable a feature, and 1 to enable a feature or path.Run the installation command:
1
2
cd C:\Users\user\Desktop python-3.13.7-amd64.exe /quiet .\unattend.xmlVerify Installation:
1python -V
MacOS
For macOS, we need to check whether the system has a pre-installed python environment.
- If you’re using macOS Monterey 12.2 or earlier, you may already have Python 2.7 pre-installed. However, the latest version has been upgraded to Python 3, which has significant improvements and improved security compared to Python 2.7. Additionally, Python 2.7 is outdated and no longer officially supported
- If you are using macOS Monterey 12.3 or later, Apple has completely removed Python 2.7 and will need to install Python manually
To check if your macOS has Python installed, open Terminal and do something like this:
- Run
python --versionIf the version is 2.7.*, Python 2.7 is pre-installed - Run
python3 --versionIf the version is 3.x.*, Python 3 is pre-installed
Note: Recent versions of macOS include a python3 command in
/usr/bin/python3that links to a usually older and incomplete version of Python provided by and for use by the Apple development tools, Xcode or the Command Line Tools for Xcode
You should never modify or attempt to delete this installation, as it is Apple-controlled and is used by Apple-provided or third-party software
If you choose to install a newer Python version frompython.org, you will have two different but functional Python installations on your computer that can co-exist
The default installer options should ensure that its python3 will be used instead of the system python3
Here are a few common installation methods for Python, and you can choose the one that suits you according to your needs.
Install Python through the official installer
Download the Python installer: Visit the macOS download address on the Python official website: Python for macOS Alternatively, you can download the installer by visiting the mirror website:
If you know of other mirror sites, please contact me to update them!
After the installer is downloaded, open the Finder - find the .pkg file in the Downloads folder – double-click to open it to start the installation

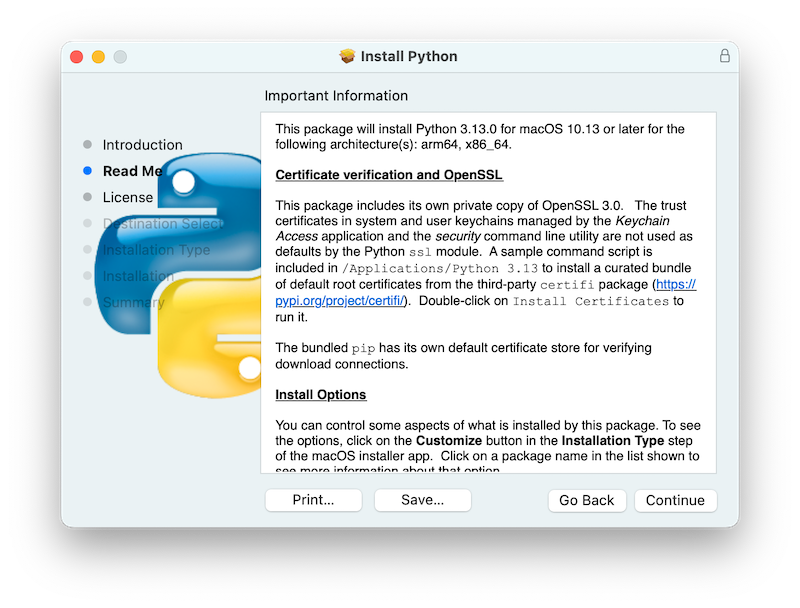
Clicking on the Continue button brings up the Read Me for this installer. Besides other important information, the Read Me documents which Python version is going to be installed and on what versions of macOS it is supported
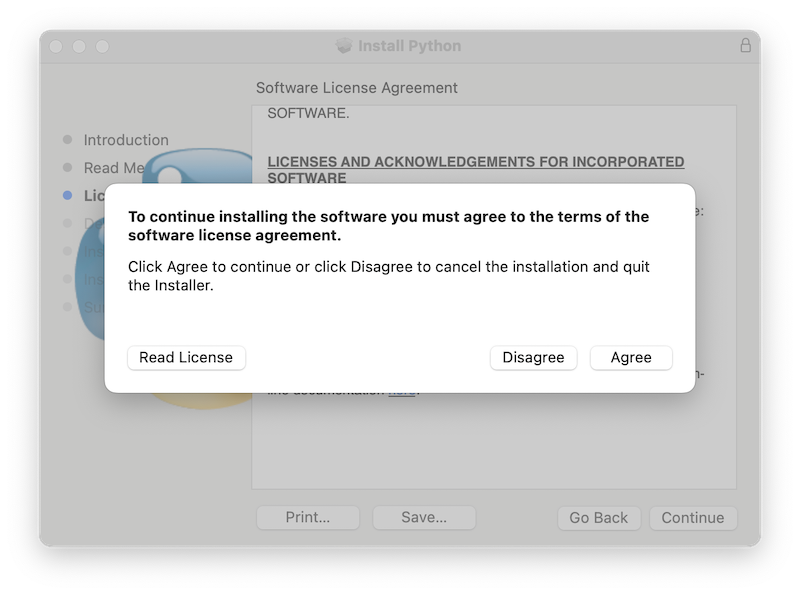
Clicking on Continue proceeds to display the license for Python and for other included software. You will then need to Agree to the license terms before proceeding to the next step
After the license terms are accepted, the next step is the Installation Type display. For most uses, the standard set of installation operations is appropriate. If you need to customize the installation, please refer to the introduction of Windows customize installation
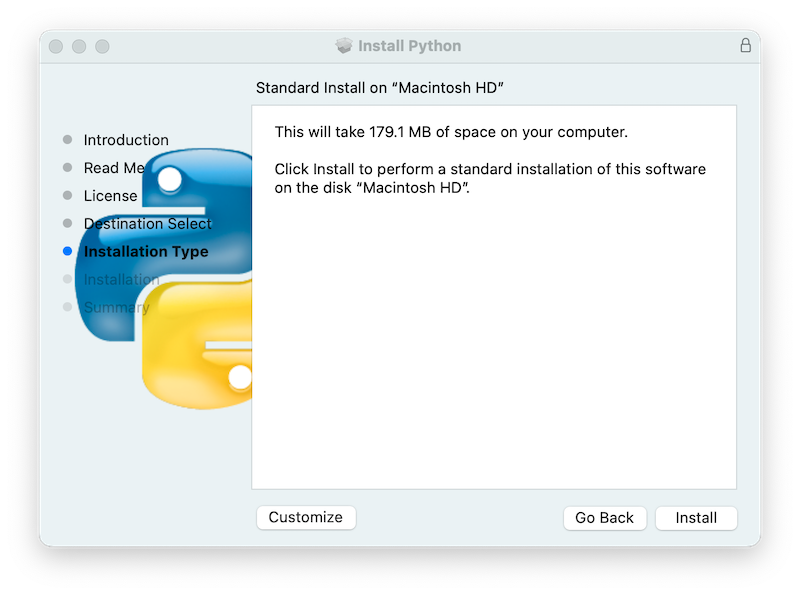
In either case, clicking Install will begin the install process by asking permission to install new software. A macOS user name with
Administratorprivilege is needed as the installed Python will be available to all users of the Mac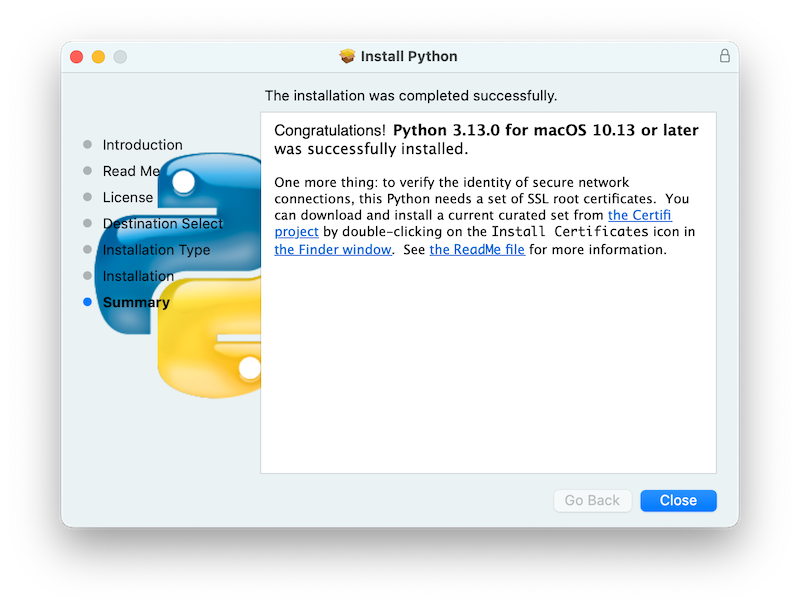
Locate and double-click the Install Certificates.command icon in the folder that pops up or find the file in
/Applications/Python 3.13/and double-click to complete the installation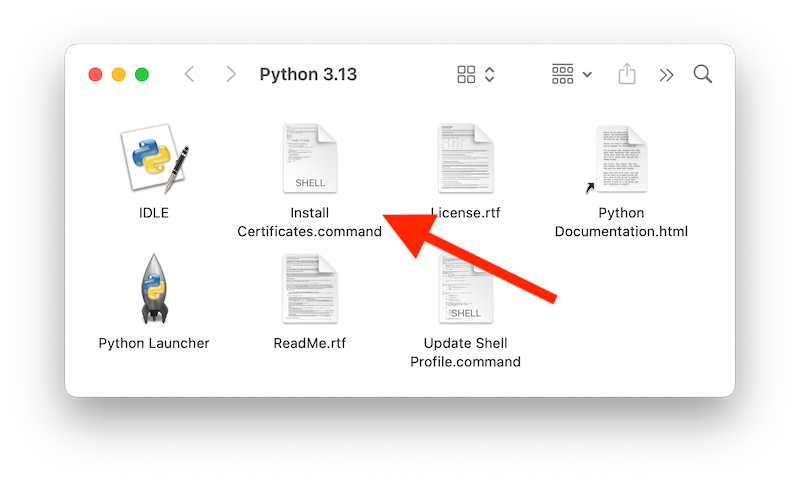
This will open a temporary Terminal shell window that will use the new Python to download and install SSL root certificates for its use
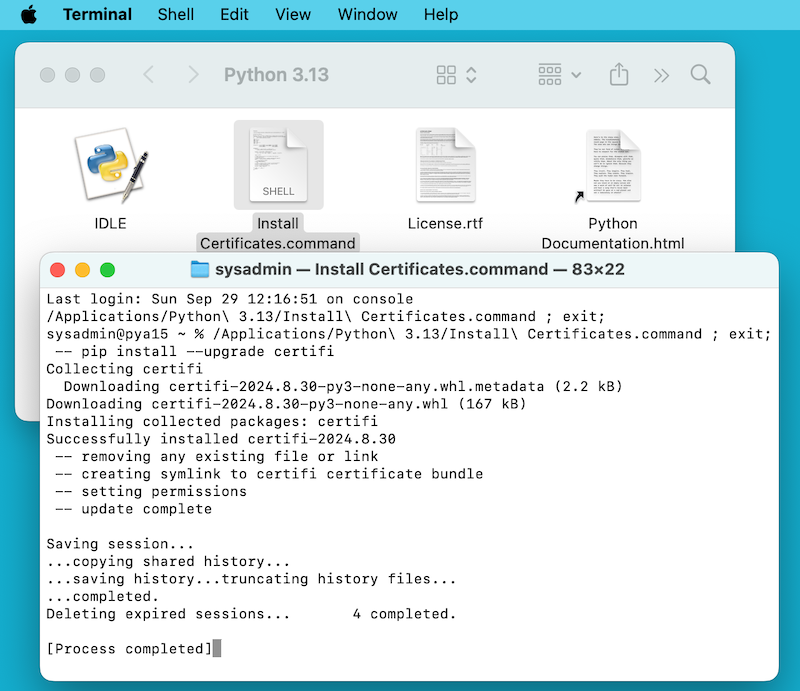
If
Successfully installed certifiandupdate completeappears in the terminal window, the installation is complete. Close this terminal window and the installer window
Install Python with Homebrew
Another way to install Python on macOS is to use Homebrew. Homebrew is a third-party package manager for macOS that allows for quick application installation using Terminal, providing macOS with a Linux-like package management experience. Interestingly, Homebrew requires support for Python to work properly. Therefore, installing Homebrew requires available Python support, which is the older version of Python used by Apple’s system developer tools mentioned earlier. To install Python on macOS using Homebrew, follow these steps:
- Open the Terminal application – Run the
brew --versioncommand to check if Homebrew is installed: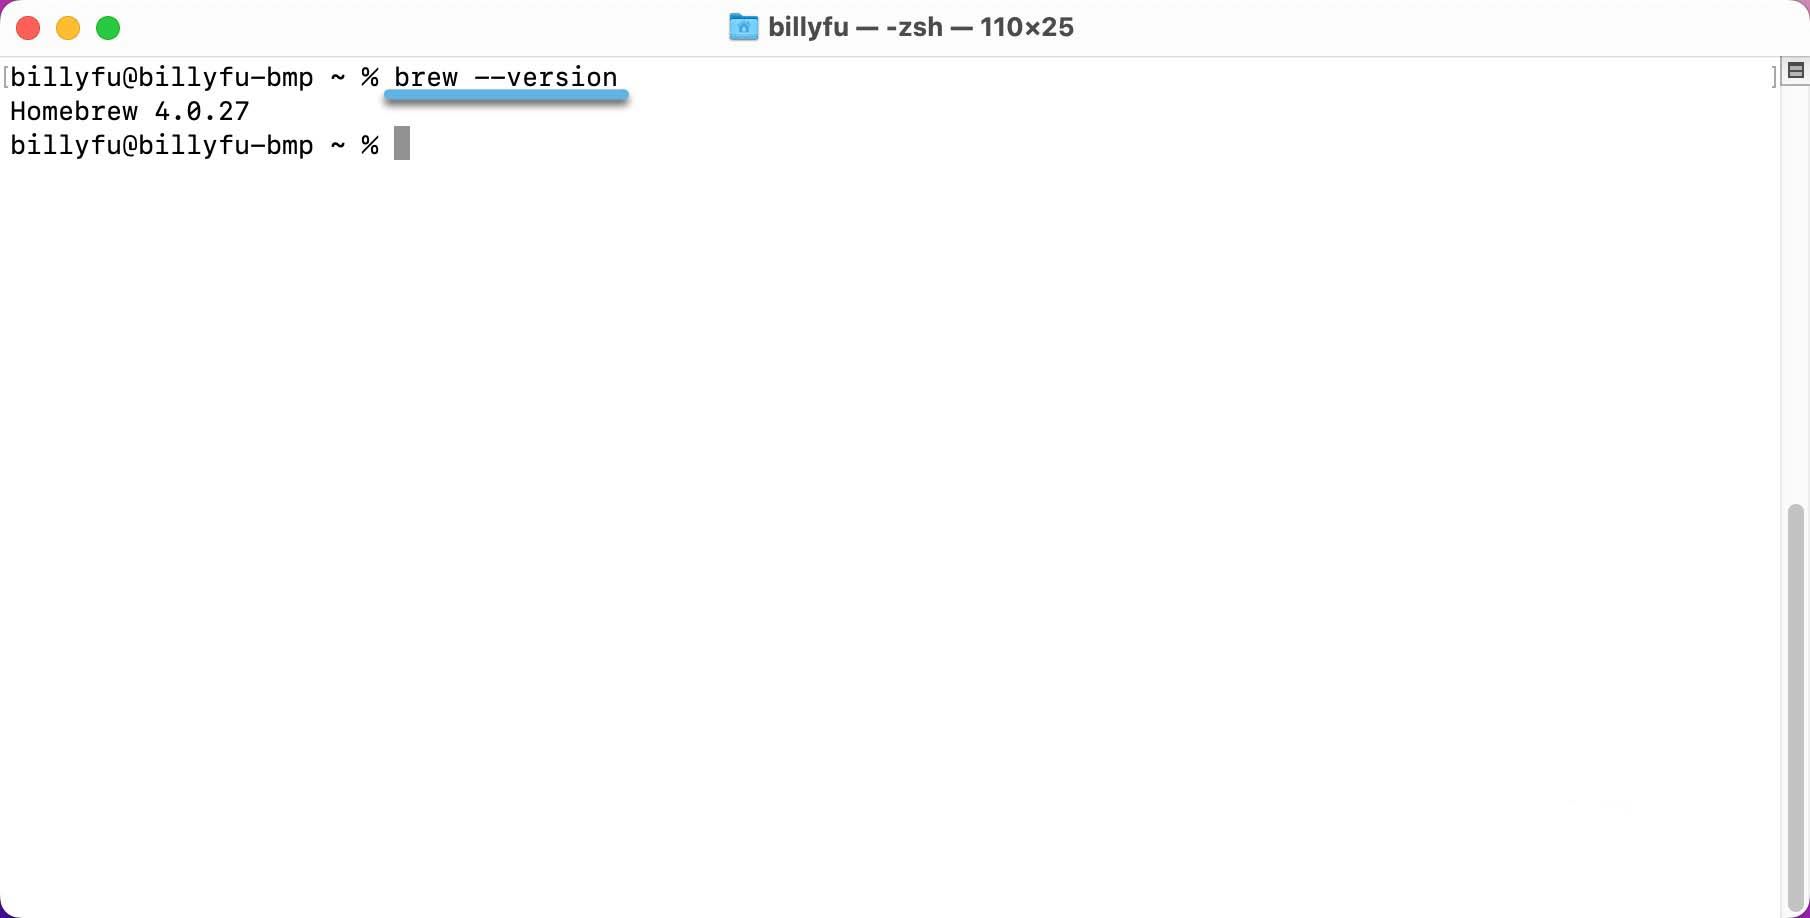
- If Homebrew is already installed, skip straight to step 4
If Homebrew is not installed, run the following command in Terminal to install Homebrew:
1/bin/bash -c "$(curl -fsSL https://raw.githubusercontent.com/Homebrew/install/HEAD/install.sh)"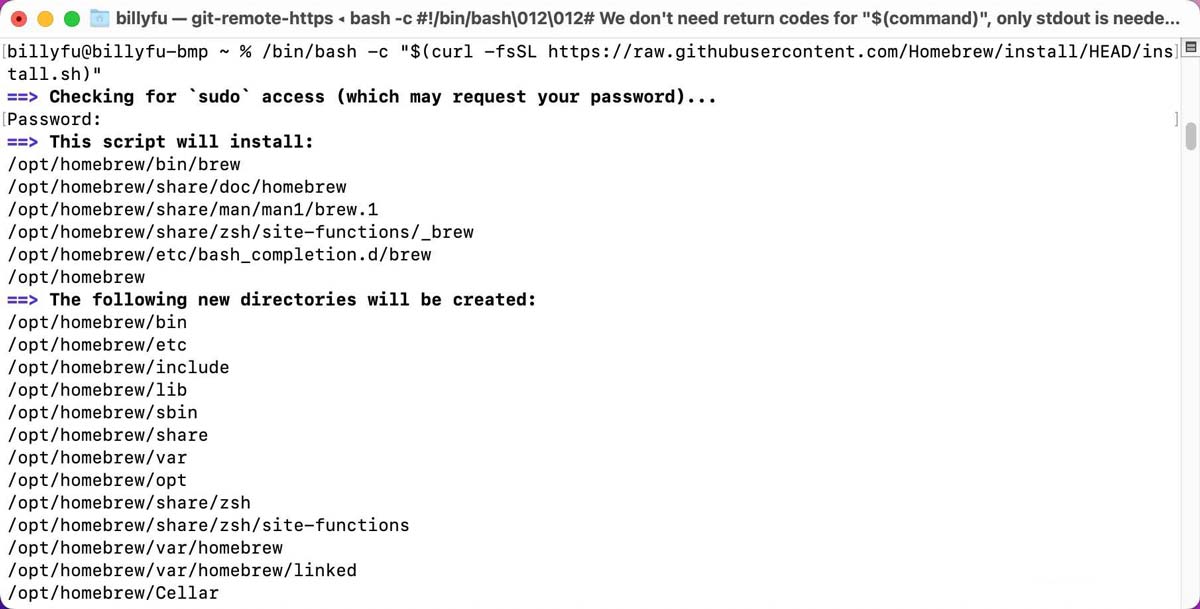
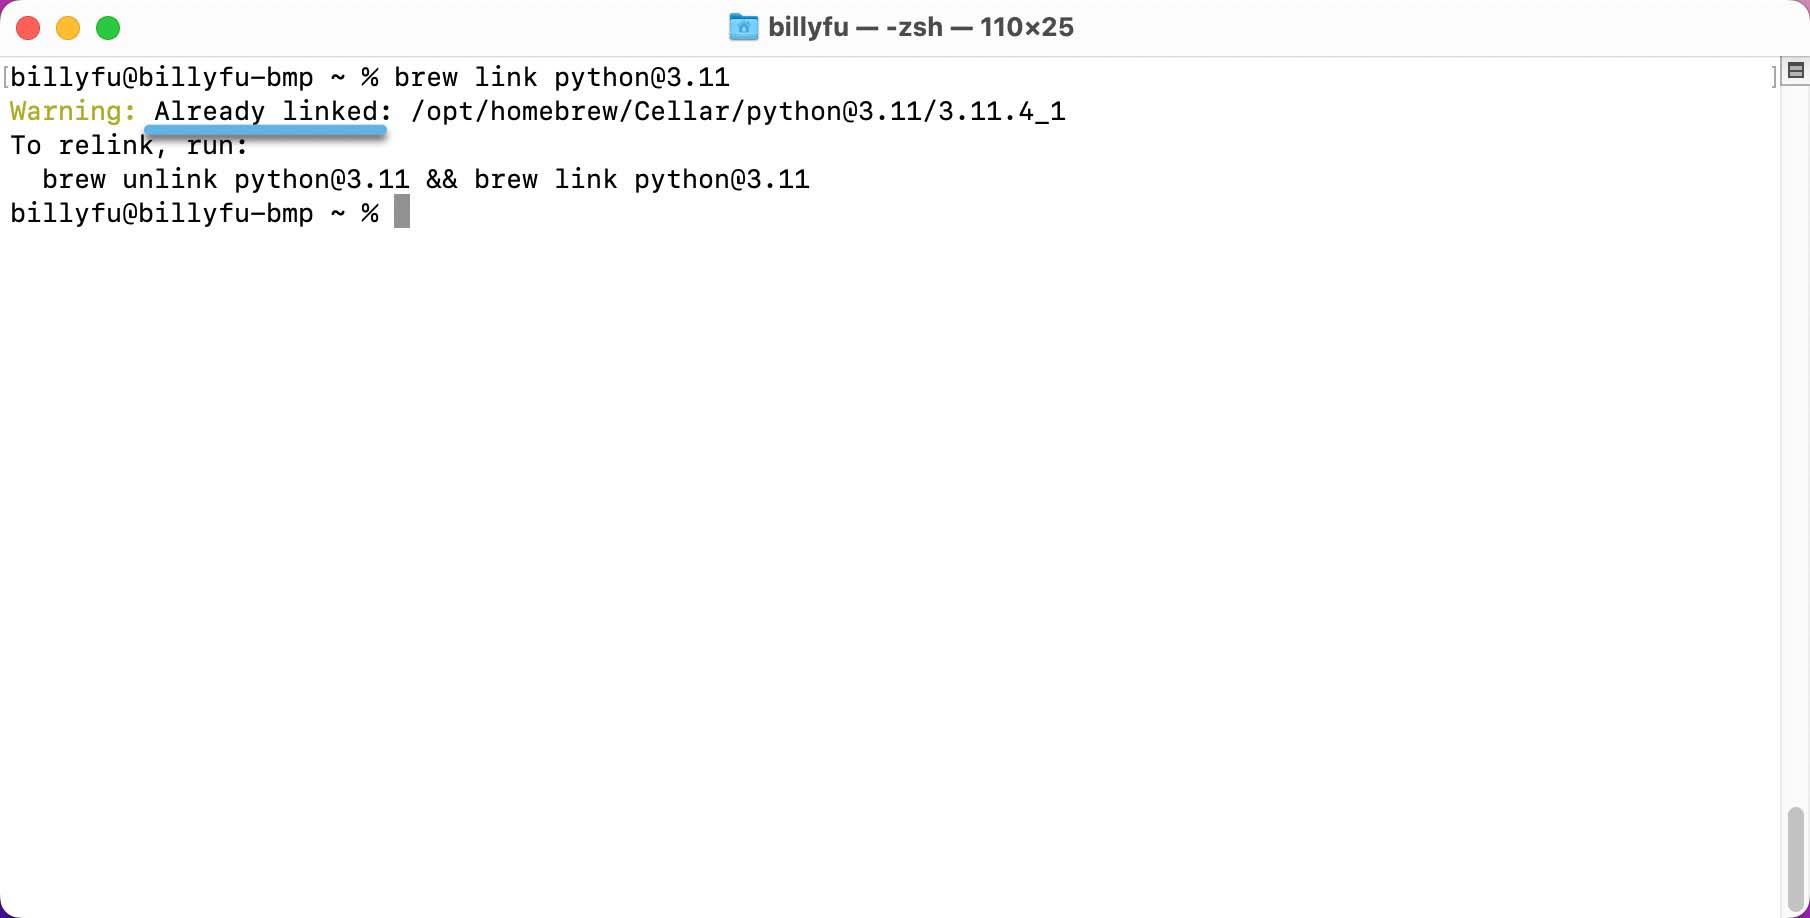
- Once you have Homebrew installed, you can use it to install Python:
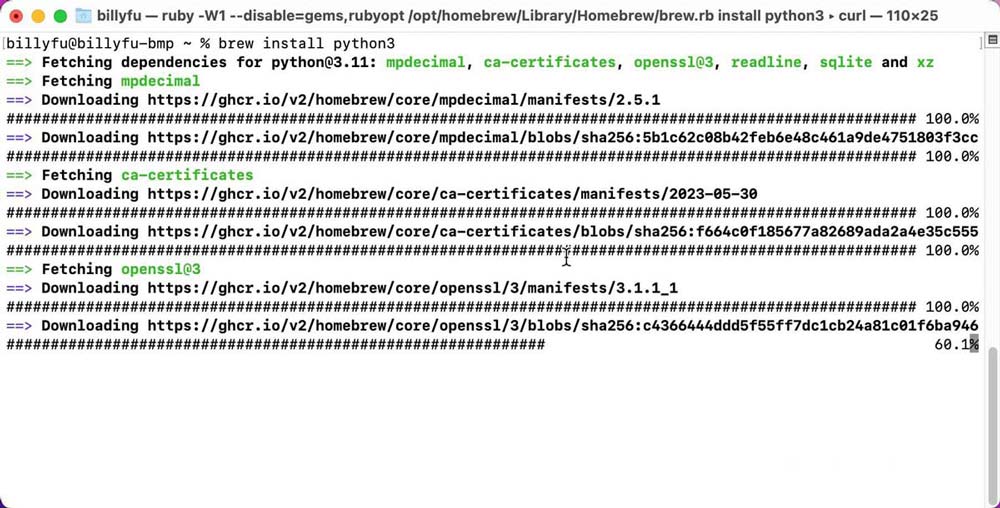
- Run Brew Link Python or Brew Link python@3. XX (replace XX with the correct version number) - Then restart the Terminal application to make sure the application is working properly
- Once the installation is complete, you can run the
python -–versionorpython3 –-versioncommand to verify the installation
Linux
The simplest way to install Python on a Linux system is to use the package manager. Below are methods for installing Python with different package managers:
Debian / Ubuntu / Mint
For Debian / Ubuntu / Mint systems, Python is typically installed using the apt package manager:
| |
CentOS / Fedora / Red Hat
yum
For older CentOS / Fedora / Red Hat systems, Python is typically installed using the yum package manager:
| |
dnf
For newer CentOS / Fedora / Red Hat systems, Python is typically installed using the dnf package manager:
| |
Arch Linux
For Arch Linux systems, Python is typically installed using the pacman package manager:
| |
SUSE / openSUSE
For SUSE / openSUSE systems, Python is typically installed using the zypper package manager:
| |